When I told my friends I was going to take the Wilton Course 1 Building Buttercream Skills class at Jo-Ann Fabric and Craft Store they thought I must be going to teach the class. After all, I’ve been decorating cakes using the Wilton method since before I was married and I’ve been married, shall we just say, decades?
I told them I was going to learn new techniques and perhaps brush up on ones I was already familiar with. And I did! One method and design that immediately caught my eye was called the Pulled Drop Method.
I first saw this on a cake in the class brochure piped in calming blues and greens and it was beautiful but I knew I had to use my own color scheme of pink and orange to make it my own. It’s this unlimited versatility that I love about cake decorating.
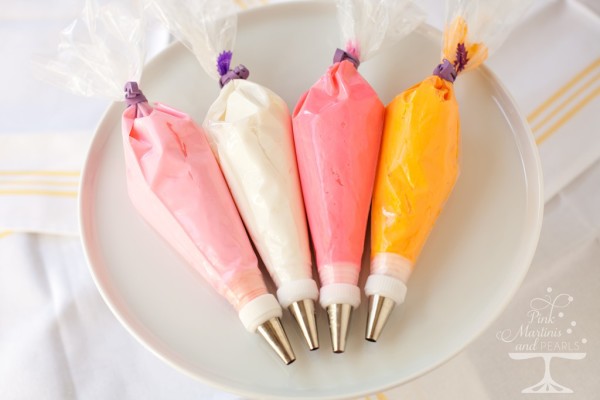
This technique, in it’s basic form with one color uses only one tip – a plain round. To speed things up a bit since I used multiple colors, I used two #10’s, an #11 and #12 because that’s what I had in my supply. I compensated with the slight differences in tip opening sizes by squeezing the decorating bag’s icing with more or less pressure.
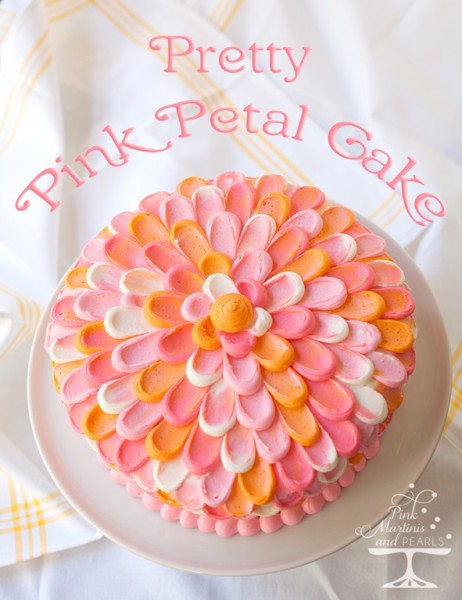
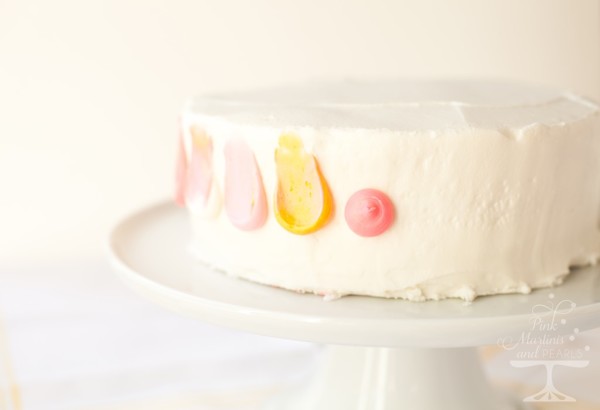
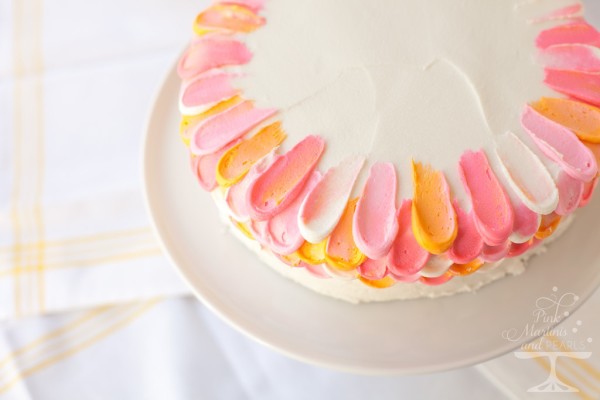
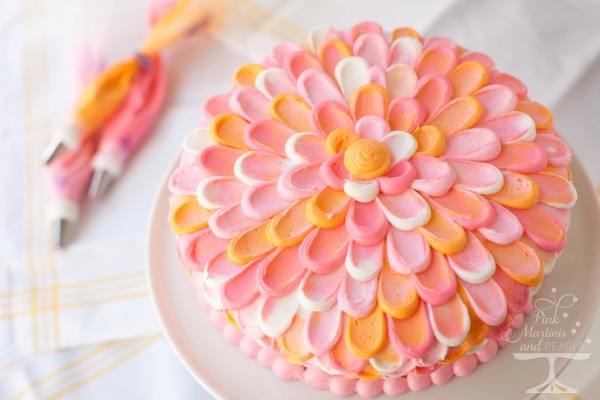
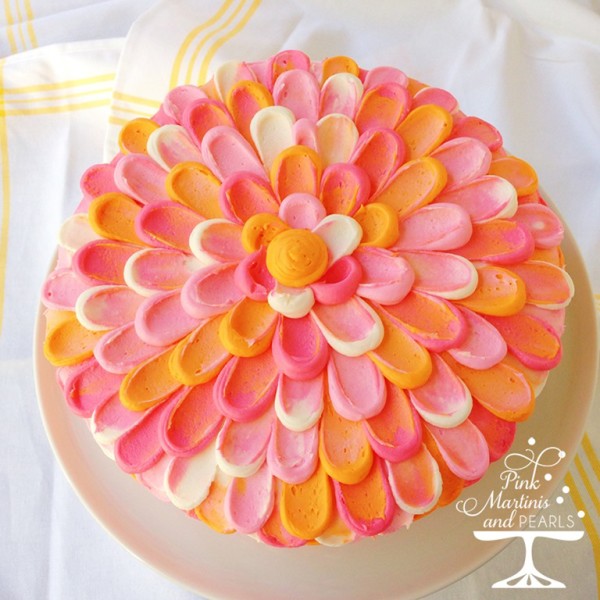
I chose my color pattern of dark pink – orange – light pink – white. I piped dots around the cake in one horizontal layer and then took a small spatula and pushed it onto the dot and pulled it away. It’s like smearing a pat of butter on toast.
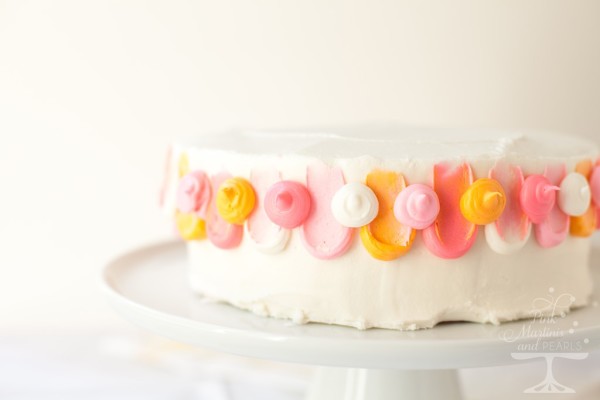
You’ll make a second layer between the dots of the first layer, think how fish scales overlap but first I’ve a confession to make.
What happened next was pure luck to due to, uh, laziness. I admit it and what was born out of laziness turned out to be a beautiful decorative effect!
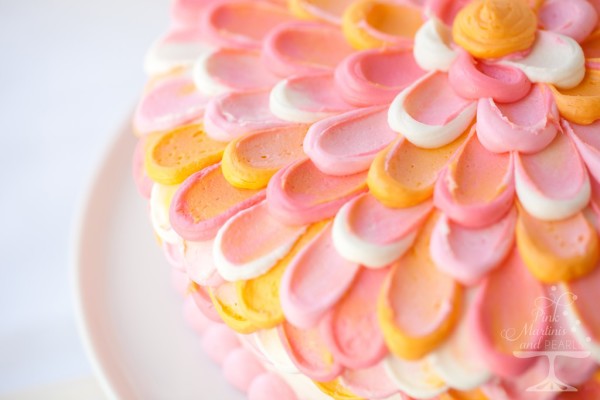
After piping two dots and wiping my spatula clean after each pull, I knew there had to be a faster way! I took the spatula with the previous dot’s color and pulled the next dot. What I discovered was that this made a beautiful variegated dot with the original dot base color and an overlay of the previous dot.
You can see this effect below. An orange overlay on dark pink, a dark pink overlay on the white, a white overlay on the light pink and a light pink overlay on the orange. You can make the effect subtle or more pronounced depending on how much of the previous dot’s icing color is on the spatula when you spread it to the next dot.
Keep the pattern going in concentric circles until the middle of the cake top is reached.
I love how this came out and it was so easy to do. No advances skills required. Honest!
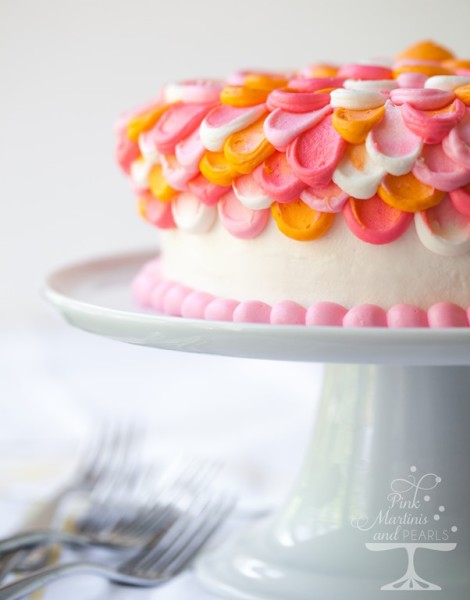
I finished the cake with a simple bead border in one color using the same tip and icing that was left over in my decorating bag.
Oh, yes. Surprise!
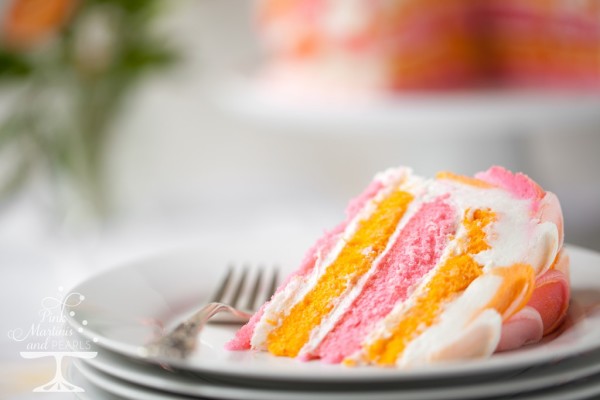
I used a Duncan Hines white cake mix using egg whites instead of the whole eggs to keep the batter true white in color. The mix made 4 cups of batter. I divided the batter to 2 cups each and tinted each with Wilton’s orange and rose pink icing colors respectively and baked them into two 8” round prepared cake pans. Once baked and cooled, I split each layer then stacked them alternatively when it was time to ice them.
I hope this inspires you to bake a cake today. 🙂
This is a sponsored post. As a Wilton Brand Ambassador, I received compensation and/or product from Wilton Cake Decorating. All opinions and endorsements of the products I mention are my own. If I didn’t love them… you know. 🙂
Wilton Products I used to decorate this cake with links:
#11 Decorating Tips (plain open tips)
Ready-to-Use Decorator Icing
Icing Colors
Disposable Decorating Bags
Icing Bag Ties (optional but LOVE these)
Angled (offset) Spatula
Past Wilton Posts –
Fabulous Fondant Daisies
Father’s Day Golf Themed Cupcakes
My Trip to the Wilton Sweet Up (Mothership)
Peeps Brunch Bunnies
Whimsical Springtime Brunch
Twist Quick Coupler Review
Sweet Treat Team
