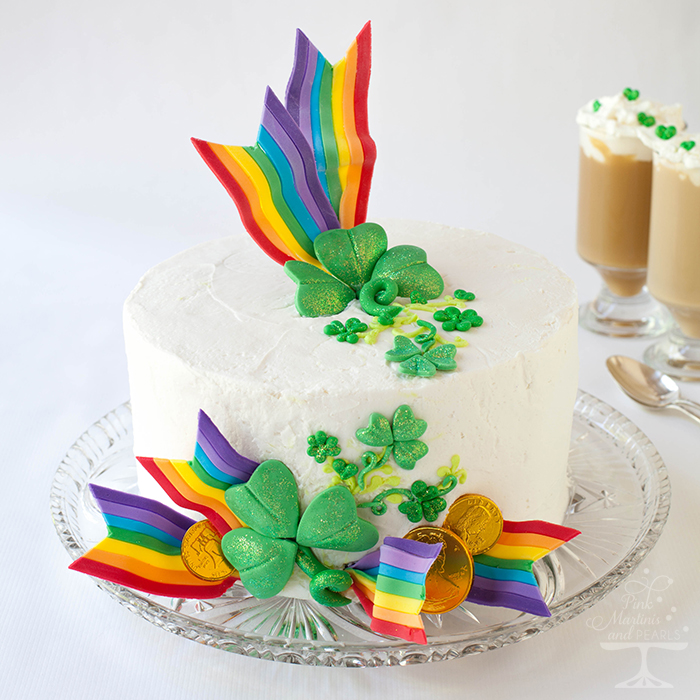
For weeks I’ve been daydreaming about creating a St. Patrick’s Day cake with bright, vivid colors and dimensional decorations. Of course, rainbows, shamrocks and Leprechaun’s gold had to be included in the decorating theme of the cake. And like any dreamer that follows the rainbow’s end, guests will find a surprise inside the cake!
I received some really nice emails from readers (thank you!) who enjoyed reading my thought process as I began this St. Patrick’s Day design that I wrote about in my previous post, so here’s more sweet treat insights. 🙂
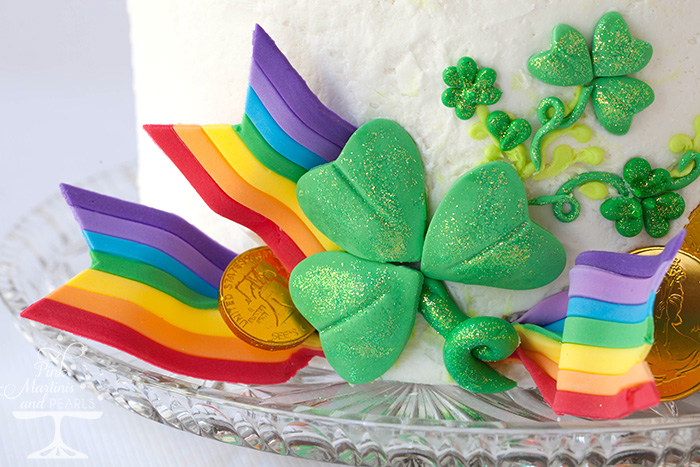
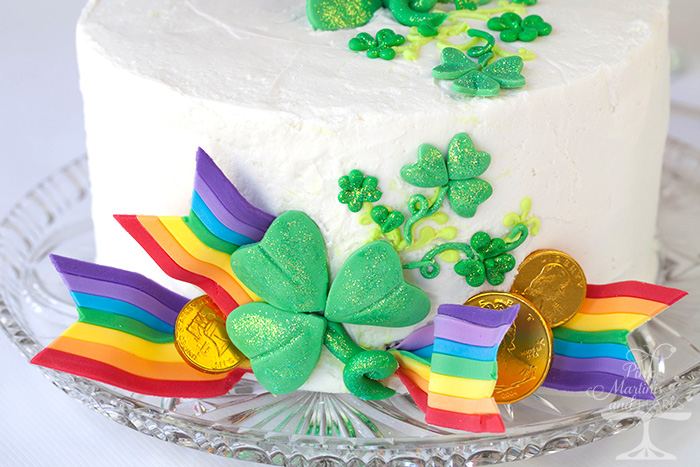
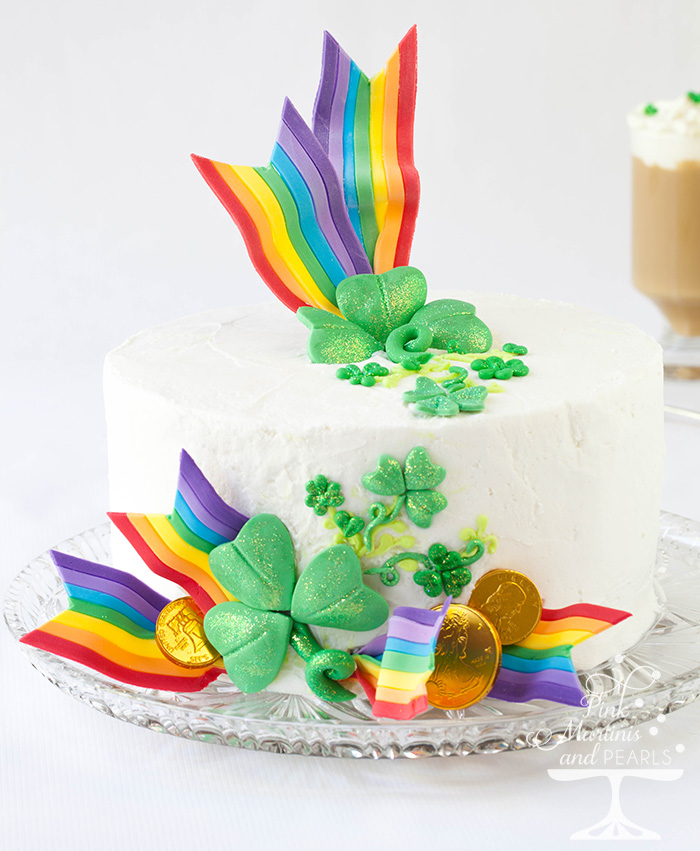
I decided on these design elements – Bold decorations given center stage with a clean white icing canvas + groupings of the decorations for the “less is more” effect + texture and height = Rainbow Ribbons to be the ‘star’ of this sweet show and I’m sharing the DIY with you in this post.
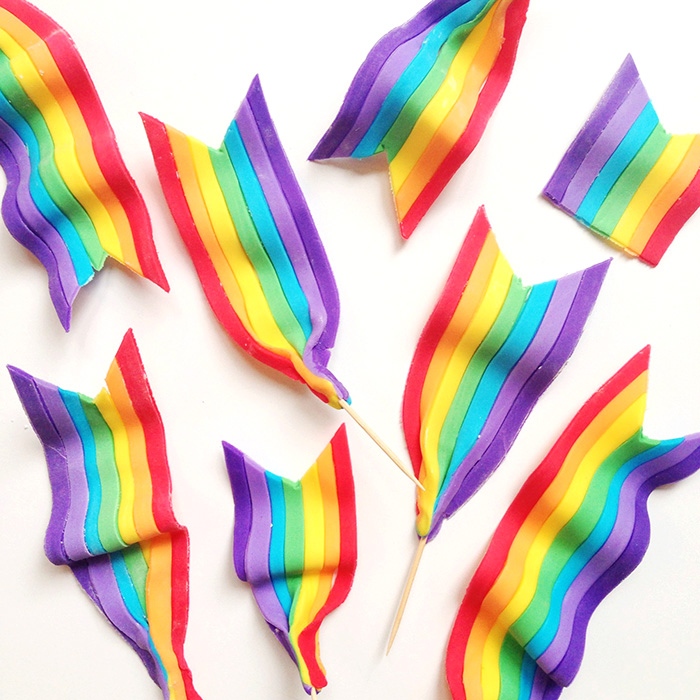
I’ve made fondant ribbons decorations attached to toothpicks before so for the rainbow ribbons (or “rainbow bacon” as I call them for fun because of their waviness), it was just a matter of aligning strips of fondant next to each other. Not a difficult thing to do especially when using the right tool that cuts out perfect strips of fondant.
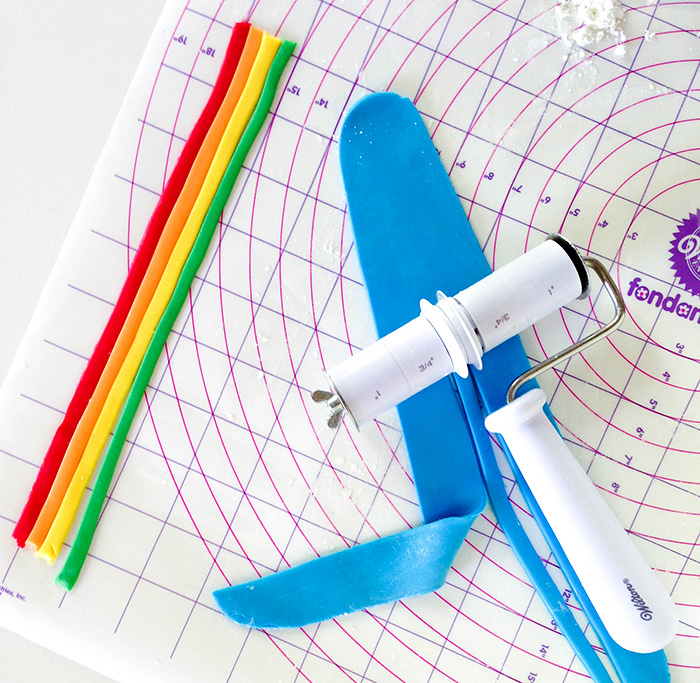
As a Wilton Brand Ambassador I have the opportunity and fun of trying out all sorts of nifty gadgets. One gadget I asked to try was the Fondant Ribbon Cutter. I first used it to make fondant ribbons for my USC cupcakes last fall. After I got to know how to set up the spacing and cutting pieces I was all set to go. I will tell you this, I will never go back to using a ruler or straight edged-whatever and knife to cut fondant ribbons again. The tool was a HUGE time and frustration saver. The cutter made consistent width strips which was key to creating the rainbows.
Here’s how you can make them too! To make the fondant rainbow ribbons:
1. Color pieces of fondant with paste food colors. I used Wilton’s Decorator Preferred Fondant (love it) in white. In fact, I love this fondant so much that when I found out a gal who was my server in my favorite Mexican restaurant had a friend who wanted to try decorating cakes with fondant but couldn’t afford it at the moment, I bought her a pack of white and gave it to the server to give to her friend. I wanted her to start out her fondant experience with the best stuff to work with and that, in my opinion, is the Wilton Decorator Preferred Fondant.
But I digress – Tint 7 balls of fondant in the colors of the rainbow – red-orange-yellow-green-blue-indigo-violet. For the indigo color I used a lighter purple and for the violet color I used a deeper purple.
2. Roll out one color at a time into a long thin strip. I placed the 1/4″ cutting wheel on the fondant cutting tool. Run the cutter over the fondant. If the fondant sticks at first to the cutter, just coax it out of the groove. You’ll get the hang of this.
- TIP: Use the cutting tool on a hard surface for the cleanest cut. I learned even rolling with a table cloth under my fondant Roll n’ Cut Mat made a difference. For the sharpest edge place the fondant mat directly on a hard surface or use a board. Using this mat however lets you use less corn starch to prevent sticking than a regular cutting board. The Roll n’ Cut Mat works so well with the fondant that most of the time I don’t have to use any cornstarch at all but I have it on hand if I need it.
3. Place the strip over to the side of your working area. Keep it straight so the other strips will line up straight against it. Proceed with rolling out each color and place each fondant strip next to the preceding strip. Gently nudge them together as you go along. When all the colored strips of fondant are lined up, give the top of the completed rainbow ribbon a gentle rolling with a small fondant rolling pin. Brush off any residual cornstarch if you’ve used this to dust your rolling surface.
- TIP:
If you have to leave your work before finishing, place a piece of plastic wrap over the strips so they don’t dry out. If they dry out too much they won’t stick together. If this happens, moisten a very small brush and run it over the seam between strips. Make sure the strips are touching each other.
4. To form the ribbons, cut them into various lengths. To make a pick, gather the bottom end and insert a toothpick pinching the fondant around the toothpick. Cut a notch in the top end with a knife blade or metal spatula.
- TIP: “Why should I use a toothpick when making the rainbows, can’t I just stick the rainbow ribbon into the cake without it?” Not if you want it to stand straight up. Fondant this thin needs more strength and stability if it’s stuck into a moist cake, especially if you want it to do anything besides lay flat on a cake. Fondant’s not a big fan of moisture so help it out and show it some love and support – in this case, a toothpick. 🙂
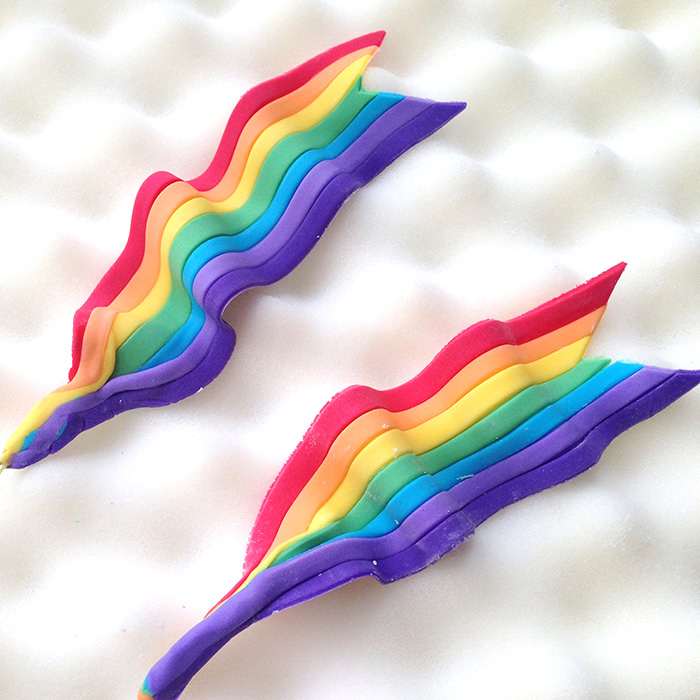
5. Bend each ribbon into a wavy shape while it’s still pliable and place on a supported surface to dry. I didn’t brush off all of the cornstarch on the ribbons below. Remember to do this before you shape the ribbons.
They will be stiff within an hour but still very fragile. I dried mine overnight so they’d be firm enough to be able to decorate with them. A couple days drying time is even better. Fondant decorations will keep indefinitely.
For the shamrocks, I also used fondant but instead of using a shamrock cutter because they’re usually larger for cookies, I used graduated Fondant Heart Cut-Outs heart shaped cutters. More on the fondant shamrocks in my next DIY post when I continue my fondant love and share the St. Patrick’s day cupcakes.
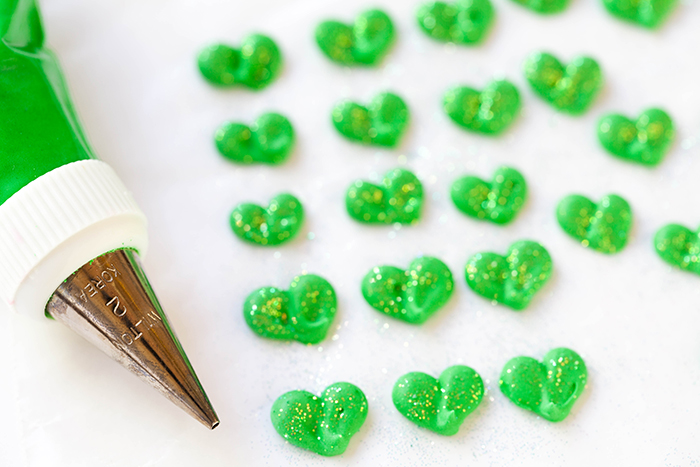
I also made tiny green hearts out of royal icing with a #2 decorating tip and sprinkled them with green Disco Dust. Like the fondant hearts, three individual hearts placed together form a shamrock.
I used them here and there to finish an icing vine and to garnish the whipped cream for the Irish coffee (see the first and last photos in this post).
For the cake, I’ve always wanted to try making a checkerboard cake so since I happened to have the Checkerboard Cake Set, I thought a kelly green and white cake would be fresh and pretty to go along with the cake decorations. A 5 tiered rainbow cake would have been a natural way to go for St. Patrick’s Day but I always like to go for the more unexpected and I didn’t want to overboard on going over the rainbow. Ha!
The cake pan set comes with 3 pans, an insert and directions. Each pan, which is one layer, takes one boxed cake mix. I used Duncan Hines and had a little batter left over from each box.
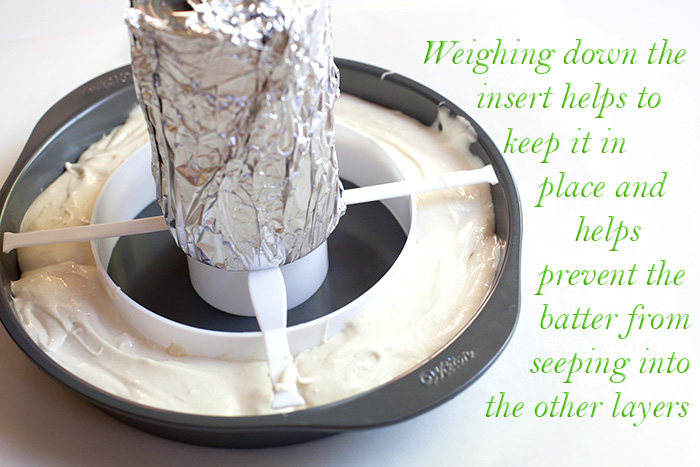
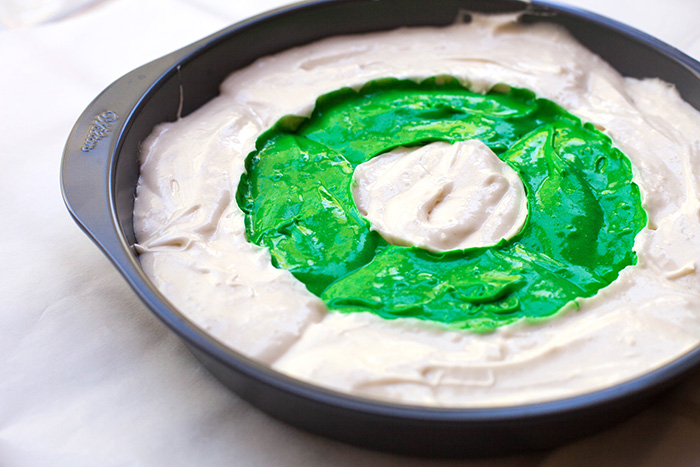
My first batter-to-pan layer attempt was not the best. I found the insert lifted up and allowed for some of the batter to spread between the rings especially when I tried to distribute the spooned-in batter so I rigged this up –
Wrapping the can kept it clean from batter drips.
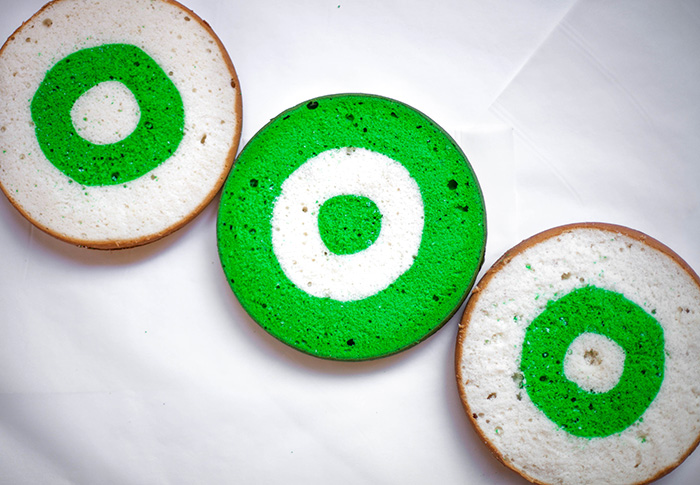
The measuring of the batter color was easy. I didn’t! I had two mixers going for two box mixes to be baked at the same time. One I tinted green, the other I left white. I then used both mixes for the two layers because each layer uses one cake mix. For the third layer, using the third box mix, I left it white and spooned in what I needed to be white then tinted the remainder green. No measuring of green vs. white batter. How easy was that?
After the pans were filled I carefully lifted the insert straight up.
The baked cakes looked so cool. I hope I was on target so far! 😉
To save some time (and because I really do like this icing to work with and for the taste) I used Wilton Ready-To-Use Decorator Icing in the big daddy tub. I emptied the contents of the container in my Kitchen Aid to mix it up a bit in case there were any air bubbles and to fluff it up a little from sitting in the container but it is really “ready-to-use” so you don’t have to. The icing spreads like a dream. There’s something about the taste and consistency of this icing paired with a Duncan Hines cake that brings me right back to standing eye level with my mom’s Sunbeam MixMaster on the pull-out bread board in the kitchen of my youth. My nose would be inches away from the revolving beaters in the milky-white glass bowl so I could inhale that aroma of sweet vanilla cake batter. You too? I knew we were kindred souls. 🙂
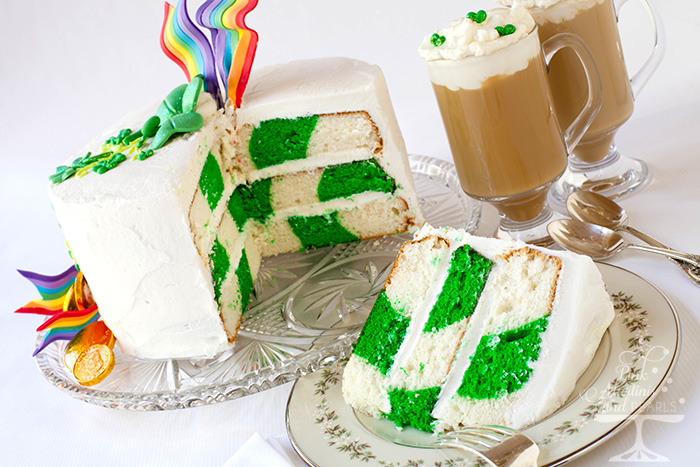
Ta-Da! The big reveal! Hmmm. Not exactly a perfect checkerboard but it may have been because I flipped two of the layers before icing so the bottom was the top and then another was the opposite or perhaps because I tapped the pans ever-so-gently to get rid of the air bubbles which really didn’t happen very well. I wonder if that makes a difference. I’ll have to ask the Wilton test kitchen bakers and see what recommendations they can send my way and then I’ll be sure to share the information with you. Still, it was very pretty, totally delicious and fun seeing something unexpected inside when cutting the cake.
Serve with Irish coffee, because there’s no reason not to!
As a Wilton Brand Ambassador and member of the Wilton Sweet Treat Team, I received product and/or compensation for this post by Wilton Cake Decorating. All opinions are my own and all the products were chosen by me to share with you. 🙂
Wilton Products I used in creating the St. Patrick’s Day Cake:
Fondant Ribbon Cutter
Decorator Preferred Fondant in white
Roll-n-Cut Mat
9″ Fondant Rolling Pin
Fondant Heart Cut-Outs
Checkerboard Cake Set
Ready-to-Use Decorator Icing
Past Wilton Posts You Might Enjoy–
Chinese New Year Decorated Almond Cookies
Make-Ahead Frozen Buttercream Decorations
Popcorn Snowmen
Shakable Snow Globe Decorated Cookies
Snowflake Gingerbread Cake
Pretty Painted Pie Crusts
Black Cinnamon Candied Apples
Decorated Ghost Cookies with Fondant
Fabulous Fondant Give-Away
Sea Life Fondant & Gum Paste Mold
Endless Summer Cupcakes
Pretty Pink Petal Cake
Fabulous Fondant Daisies
Father’s Day Golf Themed Cupcakes
My Trip to the Wilton Sweet Up (Visiting the Mothership)
Peeps Brunch Bunnies
Whimsical Springtime Brunch
Twist Quick Coupler Review
Sweet Treat Team





This cake is out of this WORLD! I love that you did the checkerboard inside and those rainbow bacon decorations are soooooo cute!! Love that you included Irish coffee too! I just had my first one at a little cafe in San Francisco and it was delicious!
Happy (early) St. Patrick’s Day!
Thank you, Danielle. Hmmm, that must be the Buena Vista. A must-do haha!
Wow! Very impressive! And it sounds yummy, too!
Thank you very much, Jan. 🙂
Incredible! I love the whole composition, but your rainbow ribbons are absolutely perfect. I’d love to have you link up your post to this week’s Party Time Link Party! http://tikkido.com/blog/link-party-35
Hi Nikki! Thank you for leaving such a nice comment and for the invitation. I’d be honored to link up if I can figure out how to. haha! Have a great day!